5 STEPS TO CREATING A ROCK SOLID PROJECT PROCESS
** This is a re-creation of the original blog post from August 26th 2021 **

One thing that makes my life SO much easier in my business is my project process.
It’s honestly a game changer and allows me to breathe when it comes to taking on new clients. Additionally, it makes me look more professional, keeps my clients in the know without a bazillion emails and helps me to make sure I have all my bases covered (no more waking up in the middle of the night wondering if I missed anything).
If you’re just getting started or need a little more organization in your business, I highly recommend nailing down your project process. Believe me, you won’t regret it.
To make it easier for you, I’ve created a step by step on exactly how to do that. Get ready to feel like an organization rock star!
WHAT YOU’LL NEED:
Paper + Pen
Computer
Your fav project management system (I use Asana)
Your thinking cap (aka your brain)
STEP 1 | THE BRAINSTORM
Get out your pen and paper, it’s time to brainstorm what is needed to create your ultimate client experience.
Write down everything you can possibly think of that you need to do to get the job done.
In my case, I wrote down everything from on-boarding to branding to webdesign to revisions to off boarding etc.
Don’t worry if it’s missing things or not quite perfect. This is just the start.
STEP 2 | THE TIMELINE
Now look at your brainstorm and begin to break it down into a timeline.
Think about things like how long will each of these things take and what order do they have to happen in.
STEP 3 | THE VISUALIZATION
Now look at your timeline and ask yourself what’s missing?
Visualize your project from start to finish.
Some questions you can think about are...
What does an initial inquiry look like?
What happens when a client decides to work with you?
Is there client homework? How does this work?
How do you start a project?
How long does a project take?
How do revisions work?
How does your final pass off work?
Now, look at the timeline you created using your brainstorm. What’s missing? Fill in any blanks.
Side note: I find it helpful to do my visualization after I have a timeline established but feel free to make adjustments to the steps for whatever fits your needs.
STEP 4 | THE CREATION
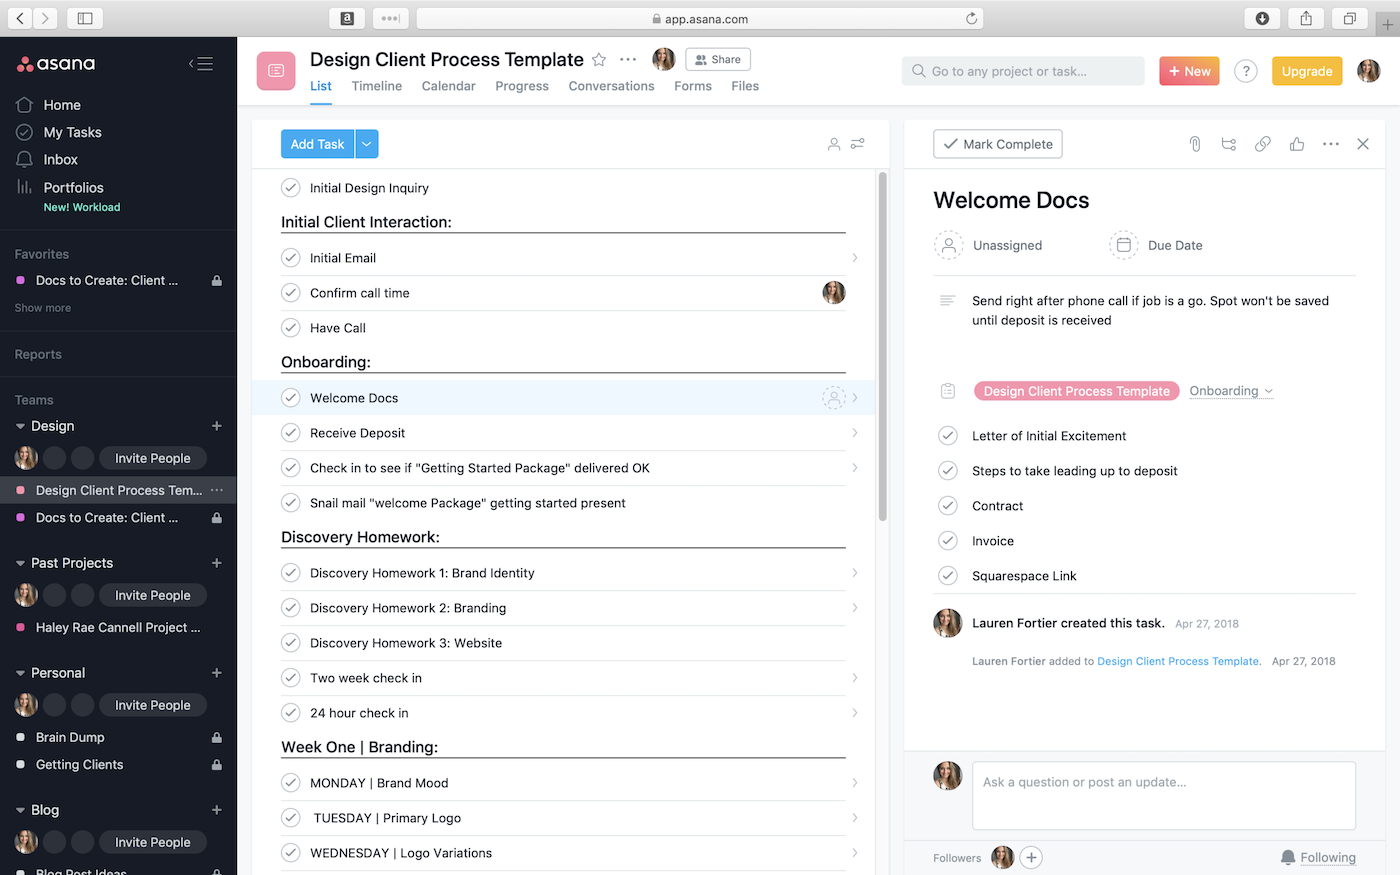
Time to whip out your project management system. I personally use Asana for this but you do you.
Start breaking your timeline down into tasks and subtasks.
How do you do this?
I find it easiest to break my process down into sections. For example: on-boarding, client homework, branding, web-design, off boarding, etc.
I then break those sections down into task. Let’s use “on-boarding” as an example. My tasks for on-boarding are welcome docs, receive deposits, and check in with client about “Getting Started” documents.
From there, I then break those tasks down into sub-tasks. Let’s look at “welcome docs.” Under my welcome docs task, I have the sub-tasks: letter of initial excitement, steps to take for deposit, contract, invoice, and Squarespace link to client portal.
While breaking down your tasks don’t worry about getting too specific about dates etc.
Specifics like dates will change as you work with different clients. We’re working on something that will be universal and can be used with everyone you work with.
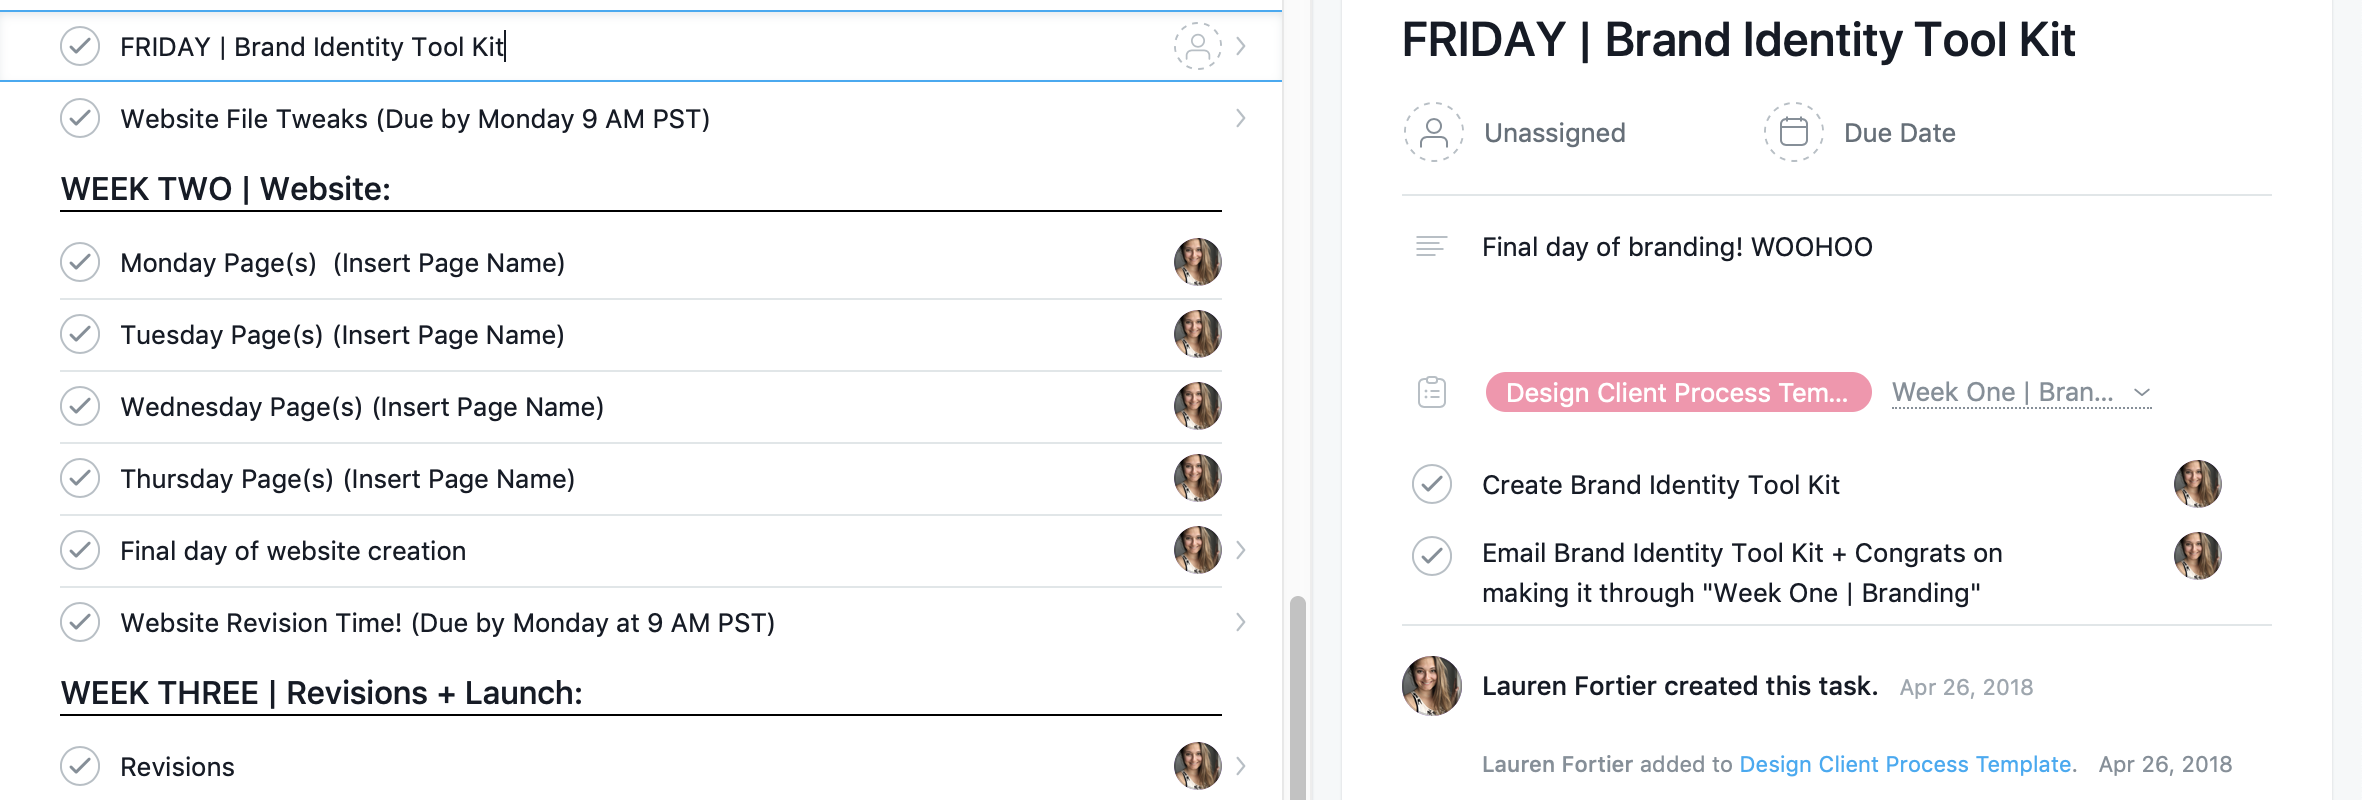
Does your client process consistently take a specific length of time? You can go as far as breaking your tasks down into days.
Here’s an example of what I mean:
STEP 5 | THE TEMPLATE
Now that you’ve broken down your timeline into tasks etc. it’s just about ready to go.
So you don’t have to recreate your process every time you have a client, you’re going to want to save your process as a template. Mine is names Design Client Process Template.
STEP 6 | THE EDIT
Woohoo! You’ve got a client and it’s time to give your new, organized process a shot.
There are just two things left to do.
First, you’re going to duplicate your template and rename it for your project. For example, if I was your client it could be something like Lauren Fortier Project Process.
Second, once you’ve duplicated your process, you’re going to fill it in with all the dates etc. for that specific project. Due dates for you, due dates for your client, comments, and so on. The more detail the better. Setting expectations is key for a smooth project.
After it’s filled in, you’re good to go. Send it off to your client and feel at ease because you know all your bases are covered.
Well there you have it! Steps to creating a wicked, awesome client process.
In the end, having an organized system that’s rock solid will save you so much time and equal happy clients.
I don’t know about you but I love me some happy clients ♥

P.S. If you’d like to know more about Asana, I’d highly recommend giving Nesha Woolery’s blog a look. I’m still no expert but what I’ve learnt so far was thanks to her content. She even sells a course all about organizing your business which I’m sure would be magical.